
As an Amazon Associate, I earn from qualifying purchases
To install a hydration bladder in a backpack, locate the hydration sleeve inside the main compartment and slide the bladder into it. Then, thread the drink tube through the designated port or opening and secure the tube in place.
When gearing up for outdoor activities, having a hydration bladder in your backpack is essential for staying hydrated on the go. By following simple steps, you can easily install a hydration bladder in your backpack, ensuring convenient access to water while hiking, biking, or traveling.
This guide will walk you through the process of setting up your hydration system, allowing you to seamlessly integrate it into your backpack for hassle-free use during your outdoor adventures. Whether you’re a seasoned hiker or a casual backpacker, having a hydration bladder will keep you refreshed and energized during your outdoor pursuits.
Preparing Your Backpack
When preparing for a hike or adventure, ensuring your hydration bladder is properly installed in your backpack is essential for staying hydrated on the trail. Here’s a step-by-step guide on how to properly install a hydration bladder in your backpack, starting with preparing your backpack for the installation process.
Choosing The Right Backpack
Before you can install a hydration bladder in your backpack, it’s important to ensure you have a backpack that is compatible with a hydration system. Look for a backpack that is designed with a dedicated hydration compartment or a pocket specifically designed to hold a hydration bladder. Ensure that the backpack has a built-in port or sleeve for the hydration tube, allowing for easy access and drinking while on the go.
Clearing And Prep Of Hydration Compartment
Once you’ve selected the appropriate backpack, it’s crucial to clear and prepare the hydration compartment for the bladder installation. Start by emptying the compartment and ensuring it is clean and dry. Check for any obstructions or debris that may hinder the proper placement of the hydration bladder.
Ensure that the hydration compartment is free of any sharp objects or rough surfaces that could potentially puncture or damage the bladder. This will help to prolong the lifespan of the hydration system and prevent any leakage during use.
Additionally, inspect the hose and bite valve to ensure they are clean and free of any blockages. If necessary, use a cleaning kit specifically designed for hydration bladders to thoroughly clean and disinfect the components for a safe and hygienic drinking experience.
Assembling The Hydration Bladder
When it comes to staying hydrated during outdoor activities, having a hydration bladder in your backpack can be a game-changer. Assembling the hydration bladder into your backpack is a straightforward process that ensures you have easy access to water while on the go. Let’s dive into the steps for assembling the hydration bladder in your backpack, starting with inserting the bladder and attaching the hose to the pack.
Inserting The Bladder
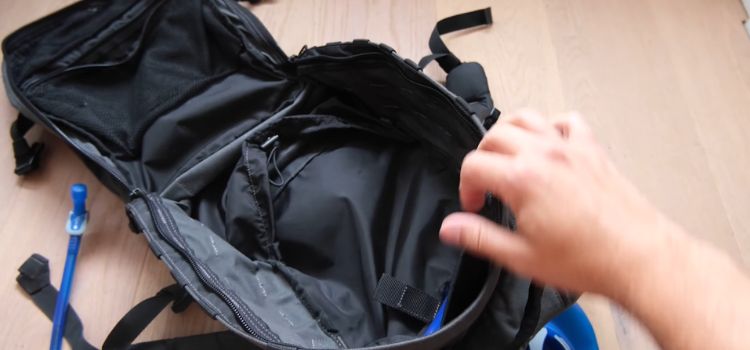
First, locate the designated compartment in your backpack for the hydration bladder. Most packs have a separate section for the bladder, usually located near the back panel. Once you’ve located the compartment, follow these simple steps to insert the bladder:
- Open the compartment and unfold it to make it easier to work with.
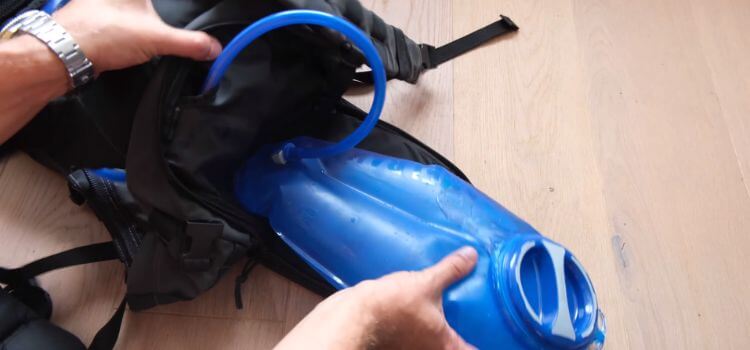
- Insert the hydration bladder into the compartment, ensuring that the opening is easily accessible for refilling.
- Secure the bladder in place using any clips or straps provided in the compartment.
Attaching The Hose To The Pack
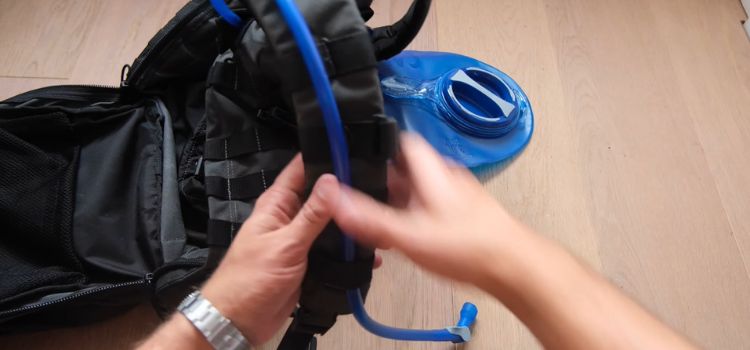
Now that the bladder is securely in place, it’s time to attach the hose to the pack. This is an essential step to ensure that you can hydrate without having to remove your pack. Here’s how to do it:
- Lay the hose along the shoulder strap of the backpack, positioning it for easy access while wearing the pack.
- Attach the hose clip to the shoulder strap to keep the hose in place and prevent it from swinging around while you move.
- Adjust the length of the hose to your preference, making sure there’s enough slack for comfortable drinking but not so much that it becomes a hindrance.
- Ensure that the hose is secure and the valve is easily accessible for drinking.
Quality Check And Testing
Ensuring Tight Seals
Before embarking on your outdoor adventure, it’s essential to conduct a thorough quality check on your hydration bladder and its installation in your backpack. Start by ensuring that all the seals and connections are tightly secured to prevent any potential leaks during your journey. Check the O-rings and connection points to make sure they are properly fitted and sealed.
Hose Positioning And Flow Testing
Proper hose positioning is crucial for optimal hydration. Position the hose in a manner that allows for easy access and smooth flow of water. Test the flow by filling the bladder with water and allowing it to run through the hose. Ensure that the flow is consistent and unrestricted, without any kinks or blockages that could hinder the water flow during your outdoor activities.
Tips For Efficient Use
When it comes to outdoor activities like hiking, having easy access to water is essential for staying hydrated. One of the most efficient ways to carry and access water on the go is by using a hydration bladder in your backpack. Here are some essential tips for efficient use that will help ensure you stay hydrated and comfortable during your outdoor adventures.
Proper Hose Placement
Ensuring that the hose of your hydration bladder is properly placed and accessible while hiking is crucial for efficient use. Here are some key points for proper hose placement:
- Secure the hose along the shoulder straps of your backpack using clip-on hose guides to keep it from dangling and getting in the way.
- Position the hose in a way that allows easy access to the bite valve without having to remove your backpack.
- Adjust the hose length according to your preference, making sure it is not too short or too long, which can cause inconvenience while drinking on the go.
By ensuring the proper placement of the hose, you can easily access your water without interrupting your hike, contributing to a more enjoyable outdoor experience.
Rehydration Frequency
In addition to proper hose placement, it’s important to consider the frequency of rehydration to effectively manage your water intake. Here are some guidelines for rehydration frequency:
- Regularly sip from the bite valve rather than taking infrequent, large drinks to maintain a consistent level of hydration.
- Adjust your rehydration frequency based on environmental factors such as temperature, humidity, and the intensity of your physical activity.
- Keep track of your water consumption and aim to sip water at regular intervals, especially during prolonged hikes or strenuous activities.
By adhering to a suitable rehydration frequency, you can prevent dehydration and maintain optimal performance throughout your outdoor excursion.
Maintenance And Storage
To install a hydration bladder in a backpack, start by ensuring it’s clean and dry. Slide the bladder into the designated compartment, making sure the tube is easily accessible. Secure the tube to the shoulder strap using clips or loops for convenient access while on the go.
Proper maintenance and storage of your hydration bladder is essential to ensure its longevity and functionality. By following these simple steps, you can keep your hydration system in top condition, ready for your next outdoor adventure.
Cleaning And Drying The Bladder
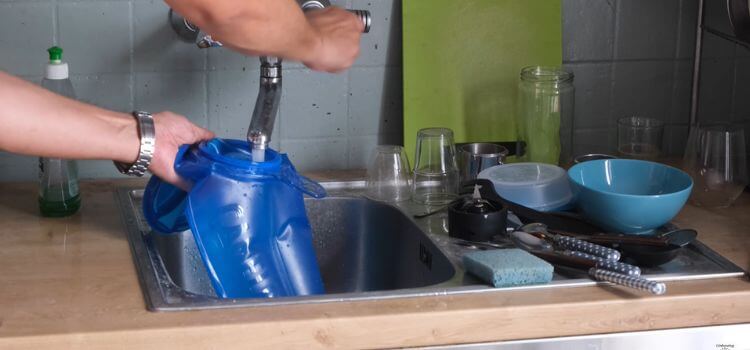
Cleaning your hydration bladder after each use is crucial to prevent the growth of mold and bacteria. To do this effectively, follow these steps:
1. Use a cleaning kit: Utilize a specialized cleaning kit designed for hydration bladders. These kits typically include a long flexible brush to thoroughly scrub the inside of the bladder, ensuring all residue and bacteria are removed.
2. Rinse with mild soap and warm water: Fill the bladder with a solution of mild soap and warm water, then use the cleaning brush to scrub the interior surface. Rinse the bladder several times to ensure all soap residue is removed.
3. Use vinegar for deeper cleaning: For a deeper clean, consider adding a solution of water and vinegar to the bladder, then allow it to soak for a few hours before thoroughly rinsing.
4. Dry completely: After cleaning, ensure the bladder is completely dry before storing it. Use a hydration bladder drying rack to allow air to flow through the bladder, ensuring all moisture is eliminated.
Storing Your Hydration System
Proper storage of your hydration bladder is essential to prevent damage and maintain its functionality. Consider the following tips for storing your hydration system:
– Keep it open and dry: After cleaning and drying, keep the bladder cap off to allow air to circulate and prevent the growth of mold and mildew.
– Avoid direct sunlight: Store your hydration bladder in a cool, dry place away from direct sunlight, as prolonged exposure to UV rays can damage the materials.
– Check for leaks and damage: Before storing, inspect the bladder for any signs of leaks or damage. Address any issues before storing to prevent further damage.
– Consider a storage pouch: If the backpack does not have a designated compartment for the bladder, consider using a separate storage pouch to keep it protected and secure.
Regular maintenance and proper storage of your hydration bladder are key to ensuring it remains in top condition for your next adventure. By following these simple steps, you can prolong the life of your hydration system and enjoy hassle-free hydration on the trails.
Frequently Asked Questions On How To Install Hydration Bladder In Backpack
How Do I Choose The Right Size Hydration Bladder For My Backpack?
To choose the right size hydration bladder, consider the size of your backpack, the duration of your trip, and your hydration needs. A larger bladder is suitable for longer trips, while a smaller one is ideal for shorter outings and smaller packs.
Can I Use Any Hydration Bladder With Any Backpack?
Not all hydration bladders are compatible with every backpack. Some backpacks have specific compartments or designs to accommodate certain bladder sizes or styles. Check the dimensions and compatibility of the bladder with the backpack before making a purchase to ensure a proper fit.
What Is The Best Way To Clean A Hydration Bladder?
Cleaning a hydration bladder involves using a mild soap, warm water, and a specialized cleaning kit. Ensure thorough drying to prevent mold and bacteria growth. Periodic cleaning and proper drying are essential to maintain the bladder’s cleanliness and extend its lifespan.
How Can I Prevent Leaks In My Hydration Bladder When It’s Inside The Backpack?
Prevent leaks in your hydration bladder by securely fastening all connections, checking for any damage to the bladder or tubing, and storing the bladder upright in the designated compartment within the backpack. Regular inspection of the bladder and its components can help identify and address any potential leaks.
Conclusion
Knowing how to install a hydration bladder in your backpack is essential for staying hydrated during outdoor activities. By following these simple steps, you can easily integrate the hydration bladder into your backpack and ensure a convenient and accessible water supply while on the go.
Embracing this knowledge will enhance your outdoor experience and keep you properly hydrated.
As an Amazon Associate, I earn from qualifying purchases