
As an Amazon Associate, I earn from qualifying purchases
To clean a hydration pack, first, rinse and dry the reservoir. Then, proceed to deep clean the pack and reassemble the valve.
It is important to clean your hydration pack regularly to ensure it remains safe for use. Proper cleaning of a hydration pack is essential to maintain its functionality and ensure the highest level of hygiene. Whether you’re an avid hiker, cyclist, or outdoor enthusiast, keeping your hydration pack clean will prevent the growth of bacteria and the development of foul odors.
We will outline the steps to Clean Hydration Pack effectively. By following these simple instructions, you can enjoy clean and refreshing hydration every time you use your pack. So, let’s dive in and discover the best methods for cleaning your hydration pack to keep it in optimal condition.
Why Clean Your Hydration Pack
Regularly cleaning your hydration pack is essential to maintain its hygiene and functionality. Proper cleaning methods, such as using baking soda, vinegar, or specific cleaning tablets, can help remove dirt, odors, and bacteria, ensuring clean and safe water for your outdoor adventures.
Keeping your hydration pack clean and well-maintained is essential for a variety of reasons. Regular cleaning not only helps prevent the growth of mold and bacteria but also ensures the water you drink remains fresh and free from any contaminants. Additionally, maintaining a clean hydration pack will prolong its lifespan, saving you money in the long run. In this article, we will explore the importance of cleaning your hydration pack under three key headings:
Preventing Mold And Bacteria Growth
When left unchecked, your hydration pack can become a breeding ground for mold and bacteria. The warm, moist environment inside the pack combined with residual water serves as an ideal breeding ground for these harmful microbes. The presence of mold and bacteria not only affects the taste and quality of the water but can also pose health risks if consumed. Regularly cleaning and drying your hydration pack will prevent the growth of these microorganisms and ensure your water remains safe and hygienic.
Maintaining Water Quality
A dirty hydration pack can significantly affect the taste and quality of the water you drink. Over time, residue from previous use, such as electrolyte mixes or sports drinks, can accumulate and taint the water. Cleaning your hydration pack removes any build-up, eliminating unpleasant tastes or odors that can develop. By keeping your hydration pack clean, you can enjoy clean, fresh-tasting water every time you drink.
Prolonging The Lifespan Of The Pack
A well-maintained hydration pack can last for years of active use. Regular cleaning helps to minimize wear and tear on the pack’s materials and components, such as the bladder and tubing. Proper maintenance also reduces the risk of leaks or malfunctions that could render the pack unusable. By taking the time to clean and care for your hydration pack, you can ensure it remains in optimal condition and serves you well for many adventures to come.
Cleaning Methods
Regular cleaning of your hydration pack is essential to maintain its functionality and prevent the growth of bacteria and mold. There are several effective methods to clean your hydration pack, including using baking soda, vinegar, and bleach. In this section, we will explain each method in detail, ensuring that your hydration pack is thoroughly cleaned and ready for your next adventure.
Using Baking Soda
Cleaning your hydration pack with baking soda is one of the most popular and natural methods. Baking soda acts as a gentle abrasive, effectively removing dirt, stains, and odors from your pack.
To clean your hydration pack with baking soda, follow these simple steps:
- Remove the reservoir from the pack.
- Add 2 tablespoons of baking soda to a gallon of warm water.
- Fill the reservoir with the baking soda solution.
- Use a brush or sponge to scrub the reservoir, paying extra attention to any stubborn stains.
- Rinse the reservoir thoroughly with clean water.
- Hang the reservoir upside down to air dry.
Using Vinegar
Vinegar is another excellent cleaning agent that can effectively remove bacteria and odors from your hydration pack. The acidic properties of vinegar help break down grime and kill bacteria.
Here’s how you can clean your hydration pack using vinegar:
- Remove the reservoir from the pack.
- Mix equal parts of water and white vinegar in a bowl or sink.
- Fill the reservoir with the vinegar solution.
- Allow the reservoir to sit for 30 minutes to an hour.
- Use a brush or sponge to scrub the reservoir, focusing on any stubborn areas.
- Rinse the reservoir thoroughly with clean water.
- Hang the reservoir upside down to air dry.
Using Bleach
In some cases, using bleach may be necessary to remove tough stains or eliminate stubborn bacteria. However, it’s important to use bleach carefully, as it can degrade the materials of your hydration pack if used incorrectly.
To clean your hydration pack with bleach, follow these guidelines:
- Remove the reservoir from the pack.
- Mix 1 teaspoon of bleach with 1 liter of water in a bowl or sink.
- Fill the reservoir with the bleach solution.
- Allow the reservoir to sit for 30 minutes. Do not exceed this time to prevent damage to the pack.
- Use a brush or sponge to scrub the reservoir, focusing on tough stains or areas with bacteria growth.
- Rinse the reservoir thoroughly with clean water.
- Hang the reservoir upside down to air dry.
Remember to always refer to the manufacturer’s instructions for specific cleaning recommendations, as some hydration packs may require special care. By following these cleaning methods, you can ensure that your hydration pack remains fresh, clean, and ready for your next outdoor adventure.
Step-by-step Guide To Cleaning
Keeping your hydration pack clean is essential for maintaining its functionality and preventing the growth of bacteria and mold. In this step-by-step guide, we will walk you through the process of cleaning your hydration pack to ensure it stays fresh and ready for your next adventure.
Emptying And Disassembling The Pack
The first step in cleaning your hydration pack is to empty and disassemble it. Follow these steps:
- Open the reservoir compartment and carefully remove the reservoir.
- Empty any remaining water from the reservoir and remove the bite valve.
- Disconnect the tube from both the reservoir and the pack.
- If your pack has any additional compartments or pockets, empty and clean them as well.
Cleaning The Reservoir
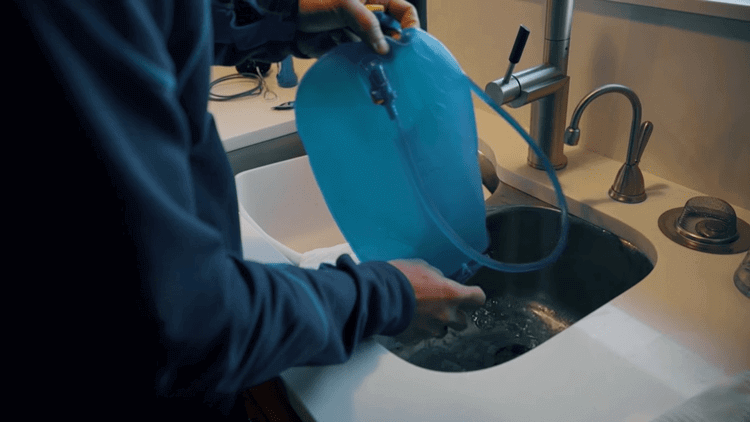
Now that you have disassembled the pack, it’s time to clean the reservoir. Here’s how:
- Fill the reservoir halfway with warm water and add a few drops of mild dish soap.
- Using a reservoir brush or a soft cloth, scrub the interior of the reservoir, paying special attention to any hard-to-reach areas.
- Rinse the reservoir thoroughly with clean water to remove any soap residue.
- For an extra deep clean, you can use a mixture of water and vinegar or a specialized reservoir cleaning tablet.
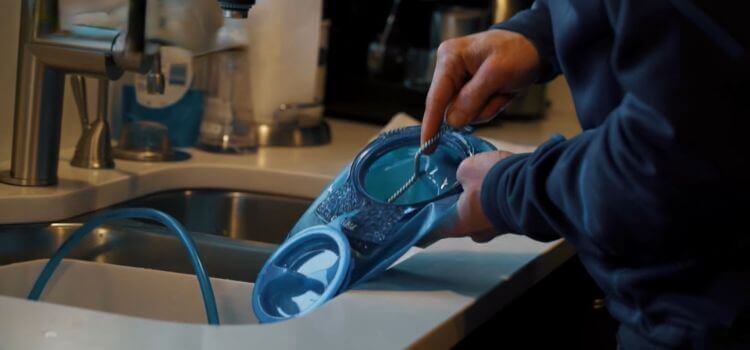
Cleaning The Tube And Bite Valve
The tube and bite valve are crucial parts of your hydration pack, and they require regular cleaning as well. Here’s how to do it:
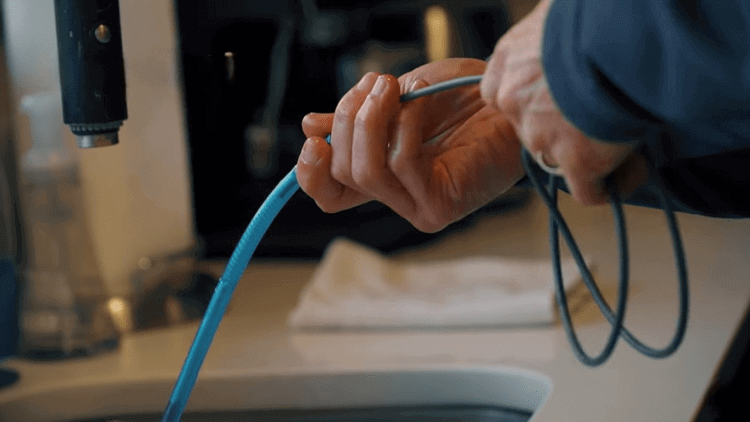
- Use a tube brush or a pipe cleaner to clean the inside of the tube. Run it through several times to ensure all dirt and residue are removed.
- For the bite valve, soak it in a mixture of warm water and mild dish soap for a few minutes.
- Once soaked, use a toothbrush or a small brush to scrub the bite valve, ensuring it’s thoroughly cleaned.
- Rinse both the tube and the bite valve with clean water to remove any soap or cleaning solution.
Drying And Reassembling The Pack
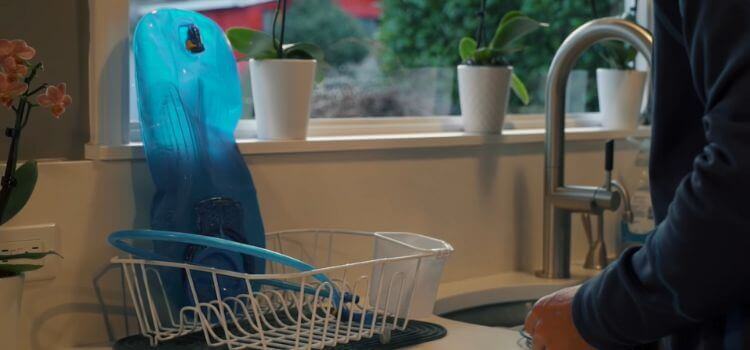
After cleaning all the components of your hydration pack, it’s time to dry and reassemble them. Follow these steps:
- Place the reservoir upright, allowing it to air dry. You can also use a drying rack or hang it upside down.
- Ensure that all components of the pack are completely dry before reassembling them.
- Reconnect the tube to the reservoir and the pack, making sure all connections are secure.
- Attach the clean bite valve to the tube.
- Finally, reassemble any additional compartments or pockets of your pack.
By following this step-by-step guide to cleaning your hydration pack, you can maintain its cleanliness and ensure optimal performance on your next outdoor adventure.
Frequently Asked Questions Of How To Clean Hydration Pack
What Is The Best Way To Clean A Hydration Pack?
To clean a hydration pack, rinse with water and use cleaning tablets or a mixture of lemon juice and water. Scrub the pack with a brush, especially the mouthpiece and tubes. Rinse again and let it air dry. Avoid using bleach and vinegar.
How Do You Get Mold Out Of A Hydration Pack?
To get mold out of a hydration pack, rinse it with a mixture of lemon juice and water or use a small amount of dish soap. You can also fill it with white vinegar overnight, then rinse and scrub with soap.
Make sure to thoroughly dry the pack before storing it to prevent mold growth.
How Do You Clean A Hydrapak?
To clean a Hydrapak, rinse and dry the reservoir, use baking soda or vinegar for a deep clean, and reassemble the valve. You can also use bottle cleaning tablets for a thorough clean. Avoid starting sentences with certain words or phrases and keep the writing concise and SEO friendly.
How Do You Clean A Gen Z Hydration Pack?
To clean a Gen Z hydration pack, rinse it with soapy water and scrub with a brush. Rinse thoroughly and let it air dry. Avoid using bleach or harsh chemicals. Lemon juice, baking soda, or vinegar can be used as natural cleaners.
Conclusion
To ensure the longevity and hygiene of your hydration pack, regular cleaning is essential. By following the proper cleaning methods discussed in this blog post, you can effectively remove dirt, bacteria, and mold from your pack. Whether you choose to utilize cleaning tablets, vinegar, or baking soda, each method is effective in maintaining a clean and fresh hydration pack.
Implementing a cleaning routine will not only extend the lifespan of your pack but also ensure that you stay hydrated with clean and safe water on all your outdoor adventures. So, make it a habit to clean your hydration pack regularly and enjoy the benefits it brings to your outdoor experiences.
As an Amazon Associate, I earn from qualifying purchases