

As an Amazon Associate, I earn from qualifying purchases
To tighten bike disc brake cables, first, loosen the bolt on the brake caliper, then pull or release the brake cable through the caliper. Next, tighten the caliper bolt back up.
Finally, check the brake pads to ensure proper adjustment. Properly functioning disc brakes are essential for safe and effective braking on a bike. Over time, the brake cables may become loose or slack, resulting in decreased braking performance. Tightening the bike disc brake cables is a simple process that can be done at home with a few basic tools.
In this guide, we will walk you through the steps to tighten your bike disc brake cables, ensuring optimal brake function and rider safety. By following these steps, you can maintain reliable braking power and enjoy a smooth and safe riding experience.
Understanding Cable-actuated Disc Brakes
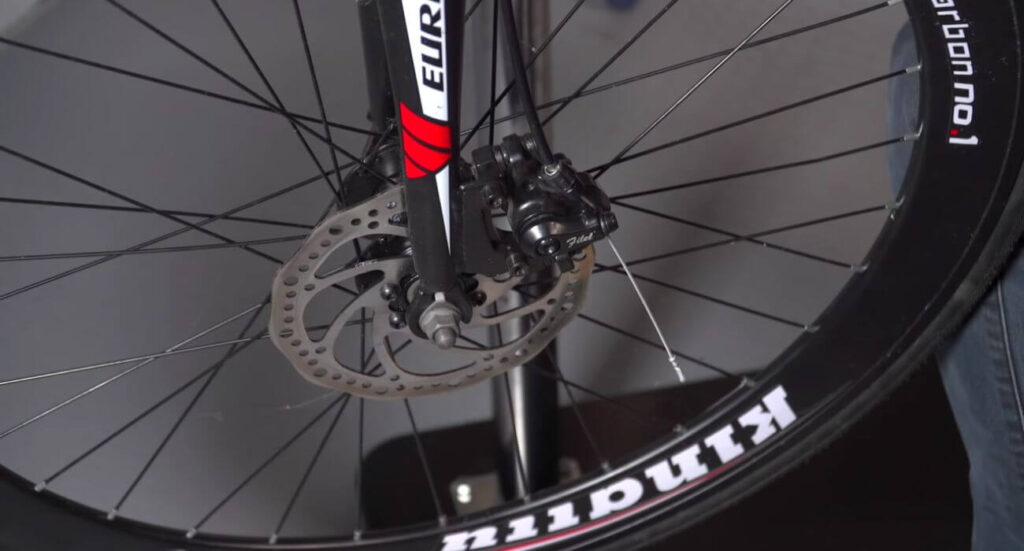
Most entry-level disc brake bikes are equipped with cable-actuated disc brakes. These brakes work by using a cable to actuate the brake caliper, causing the brake pads to squeeze the rotor and bring the bike to a stop. Understanding how cable-actuated disc brakes function is essential when it comes to tightening the brake cable and optimizing brake performance.
What Is A Cable Actuated Disc Brake?
A cable-actuated disc brake consists of a brake lever, a cable, a housing, and a brake caliper. When the brake lever is squeezed, it pulls the cable, which in turn moves the brake caliper, causing the brake pads to engage the rotor and slow down or stop the bike. The cable tension plays a crucial role in ensuring optimum braking performance and responsiveness.
Tools Needed
To tighten the cable on your cable-actuated disc brakes, you’ll need a few tools:
- 5mm Allen wrench
- Cable cutter or sharp scissors
- Needle-nose pliers
- Cable housing cutter (optional)
- Torx T-25 wrench (if your brake caliper has Torx bolts)
With these tools on hand, you’ll be able to easily adjust the cable tension and improve the performance of your disc brakes.
Troubleshooting
Before you start tightening the cable, it’s important to troubleshoot any potential issues with your cable-actuated disc brakes. Here are a few common problems you might encounter:
- Brake pad position: Check if the brake pads are aligned correctly and making proper contact with the rotor.
- Caliper barrel adjuster: Make sure the barrel adjuster on the brake caliper is properly adjusted to fine-tune the cable tension.
- Cable tension: If your brakes feel too loose or too tight, adjusting the cable tension might be necessary.
- Caliper bolts: The caliper bolts should be tightened securely to ensure the brake pads stay in place during braking.
By addressing these troubleshooting steps, you can identify any issues affecting your cable-actuated disc brakes and take appropriate measures to fix them.
Adjusting Cable Tension And Caliper Position
To tighten the cable tension and caliper position on your bike’s disc brakes, start by loosening the caliper bolts and squeezing the brake handle. Then, gently tighten the caliper bolts without shifting the caliper, and release the brake handle. This helps ensure optimal braking performance without any unnecessary shifts.
Check Brake Pad Position
Before adjusting the cable tension and caliper position on your bike’s disc brakes, it’s essential to check the brake pad position. This ensures that the brake pads are properly aligned with the rotor, allowing for effective braking. To do this:
- Inspect the brake pads by visually checking their position relative to the rotor. The pads should be evenly spaced from either side of the rotor.
- If the brake pads are misaligned, loosen the caliper bolts using a suitable Allen wrench.
- Apply gentle pressure to the brake lever to bring the pads closer to the rotor.
- While maintaining pressure on the brake lever, tighten the caliper bolts to secure the pads in the correct position.
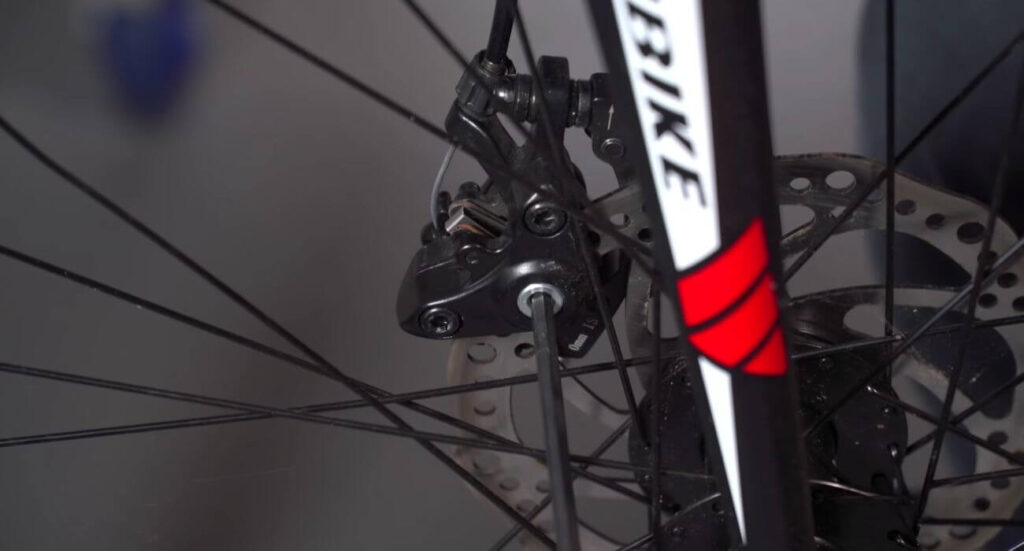
Caliper Barrel Adjuster
The caliper barrel adjuster is a small knob located where the brake cable enters the caliper. It allows for fine-tuning of the cable tension without the need for tools. To adjust the caliper barrel:
- Turn the barrel adjuster clockwise to increase cable tension or counterclockwise to decrease tension.
- Make small adjustments, testing brake performance after each turn.
- Ensure that the brake lever engages smoothly and fully, without excessive play or resistance.
- Repeat the adjustment process as necessary until the desired brake feel is achieved.
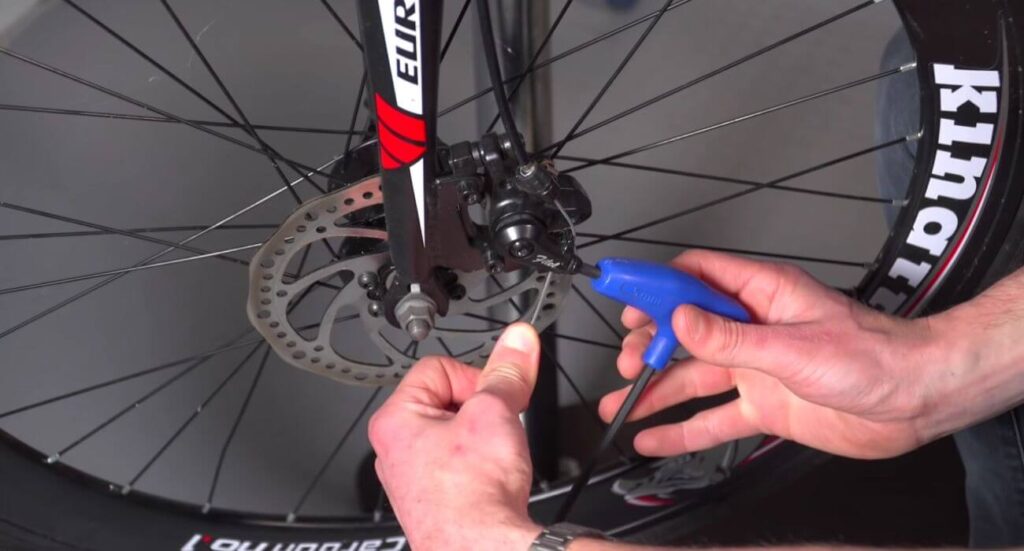
Adjusting Cable Tension
Proper cable tension is crucial for optimal brake performance. To adjust the cable tension:
- Locate the cable anchor bolt on the caliper and loosen it with an appropriate tool.
- Pull the cable slightly tighter by hand or using pliers, removing any slack.
- Tighten the cable anchor bolt to secure the cable in its new position.
- Check that the brake lever engages smoothly and fully without any excessive resistance.
Adjusting Caliper Bolts
The caliper bolts hold the caliper in place on the bike frame or fork. Adjusting these bolts ensures that the caliper is correctly aligned with the rotor. Here’s how to adjust the caliper bolts:
- Loosen the caliper bolts using an appropriate Allen wrench or similar tool.
- While keeping the brake lever engaged, align the caliper so that the brake pads are centered on the rotor.
- Tighten the caliper bolts gradually and evenly.
- Double-check the alignment by spinning the wheel and observing the gap between the rotor and brake pads. It should be consistent on both sides.
Tensioning The Caliper Bolts
To ensure that the caliper bolts remain tight and secure, it’s important to tension them properly. Tensioning the caliper bolts involves an additional step after tightening them initially. Here’s how to do it:
- Place a wrench or an appropriate tool on the caliper bolts and hold it steady.
- Using another wrench or tool, rotate the nut attached to the caliper bolt in a clockwise direction to apply tension.
- Once the desired tension is achieved, secure the nut in place by turning it counterclockwise to lock it against the caliper bolt.
- Repeat the process for each caliper bolt.
Following these steps for adjusting cable tension and caliper position will help ensure that your bike’s disc brakes perform at their best, providing reliable stopping power and a safer riding experience.
Additional Adjustments And Troubleshooting
Once you have tightened your bike disc brake cable, there are a few additional adjustments and troubleshooting steps you can take to ensure optimal performance. These adjustments will help you check the pad wear, align the disc, and make static caliper adjustments. In case you encounter any issues, we have also included troubleshooting tips to help you resolve common problems.
Checking Pad Wear
Regularly checking the wear on your brake pads is crucial for maintaining efficient braking. Worn-out brake pads can compromise your safety and reduce stopping power. To check pad wear, follow these steps:
- Inspect each brake pad for signs of wear such as uneven surfaces, smooth or glazed textures, or a noticeable reduction in thickness.
- If you notice significant wear, replace the brake pads with new ones that are compatible with your bike’s disc brakes.
Checking Disc Alignment
Proper disc alignment ensures that the brake pads make even contact with the rotor, maximizing braking performance. To check and adjust disc alignment, follow these steps:
- Visually inspect the rotor to ensure it is centered between the brake pads. If it appears misaligned, proceed to the next step.
- Loosen the bolts securing the brake caliper to the frame or fork just enough to allow for adjustment.
- Squeeze the brake lever a few times to position the caliper against the rotor.
- While holding the brake lever, tighten the brake caliper bolts to secure it in place.
Static Caliper Adjustment
If you notice that your brake lever has excessive play or the brake pads are not making proper contact with the rotor, a static caliper adjustment may be required. Follow these steps to make the adjustment:
- Loosen the bolt securing the brake caliper to the frame or fork.
- Squeeze the brake lever firmly and hold it in the engaged position.
- While maintaining pressure on the brake lever, retighten the brake caliper bolt.
Troubleshooting
Even after following the steps above, you may encounter some issues with your bike’s disc brakes. Here are some common problems and their possible solutions:
- If you experience a spongy or weak brake lever feel, it could indicate air in the brake system. Bleeding the brakes may resolve the issue.
- If your brake pads are not retracting fully, causing rubbing and reduced efficiency, check the piston seals and clean or replace them if necessary.
- In case of excessive brake noise, try cleaning the rotor and brake pads with rubbing alcohol or consider changing to different brake pad compounds.
- If the braking power feels inconsistent or weak, check the rotor for any signs of contamination, such as oil or dirt buildup. Clean the rotor and brake pads if needed.
By regularly performing these additional adjustments and troubleshooting techniques, you can optimize the performance and reliability of your bike’s disc brakes.
Frequently Asked Questions On How To Tighten Bike Disc Brakes Cable
How Do You Tighten Mechanical Disc Brakes On A Mountain Bike?
To tighten mechanical disc brakes on a mountain bike, follow these steps:
1. Pull the brake lever to check the tightness.
2. Adjust the barrel adjuster to tighten or loosen the cable tension.
3. Loosen the caliper bolts, squeeze the brake lever, and tighten the bolts without shifting the caliper.
4. Check your brake pads.
How Do You Tighten Disc Brakes On A Mountain Bike?
To tighten disc brakes on a mountain bike, follow these steps:
1. Pull the brake lever to check the tightness.
2. Adjust the barrel adjuster to tighten or loosen the brakes.
3. Loosen the caliper bolt and readjust the brake cable.
4. Tighten the caliper bolt. 5. Check the brake pads for proper alignment. Watch YouTube videos for a visual guide.
How Do You Tension A Bike Brake Cable?
To tension a bike brake cable, follow these steps:
1. Pull the brake lever to check the tension.
2. Adjust the barrel adjuster to tighten or loosen the cable tension.
3. Loosen the bolt on the brake caliper to readjust.
4. Pull or release the brake cable through the caliper.
5. Tighten the caliper bolt back up. 6. Finally, check the brake pads for proper alignment.
How Do You Tighten A Loose Brake Cable?
To tighten a loose brake cable on your bike, follow these steps:
1. Pull the brake lever and determine the tightness of the brakes.
2. Use the barrel adjuster to tighten or loosen the tension in the cable.
3. Loosen the bolt on the brake caliper and readjust the cable.
4. Pull or release the brake cable through the caliper.
5. Tighten the caliper bolt and check the brake pads. This simple process will help you tighten your loose brake cable and ensure your brakes are working properly.
Conclusion
Tightening bike disc brake cables is a crucial maintenance task for every cyclist. By following the steps outlined in this blog post, you can ensure optimal brake performance and enhance your overall riding experience. Remember to regularly inspect your cables for wear and tear, and make adjustments as needed.
With a well-maintained braking system, you can enjoy safe and efficient rides on your bike. Happy cycling!
Read More
Top 10 Best Bike Computers 2024
Top 10 Best Mountain Bike Computer
As an Amazon Associate, I earn from qualifying purchases