
As an Amazon Associate, I earn from qualifying purchases
To hatch brine shrimp eggs without an air pump, gently mix the saltwater solution periodically. This manual stirring substitutes for the oxygenation that an air pump provides.
Hatching brine shrimp eggs is a straightforward process that doesn’t always require complex equipment like an air pump. Enthusiasts and hobbyists can achieve successful hatching through simple manual methods. Creating a saline solution that mimics the natural habitat of brine shrimp is the first step.
Regular manual stirring of the solution is crucial to supply the oxygen needed for the eggs to hatch. Water temperature, light exposure, and egg quality also play significant roles in the hatching process. By maintaining these parameters and ensuring gentle water movement, it is possible to cultivate a thriving brine shrimp colony. This method is particularly helpful for small-scale operations or when access to electrical air pumps is limited.
Unlocking Brine Shrimp Egg Hatching Without Air Pump
Welcome to the intricate world of aquaculture, where we delve into the fascinating process of how to hatch brine shrimp eggs without air pump. Brine shrimp, the aquatic equivalent of a treasure box for pet fish and researchers alike, require specific hatching techniques to transform their dormant eggs into lively, swimming creatures. Forsaking the traditional air pump might seem daunting, but with the right knowledge and conditions, it is entirely possible to hatch these magical organisms seamlessly. The journey to unlocking this method enhances one’s understanding of brine shrimp eggs and underscores the importance of maintaining the ideal environment during the hatching process.
Understanding The Basics Of Brine Shrimp Eggs
Brine shrimp eggs, or cysts, are known for their resilience and ability to remain dormant for significant periods. Before undertaking the process of how to hatch brine shrimp eggs without air pump, it’s crucial to understand the unique nature of these eggs. Their durability is their superpower, as they can withstand a wide range of environmental conditions. However, to coax them out of dormancy, several factors need meticulous attention:
- Quality of eggs: Ensure the eggs are not expired and come from a reliable source.
- Water conditions: Salinity, pH, and temperature play pivotal roles in the hatching success rate.
- Light: Adequate lighting can greatly facilitate the hatching process.
Importance Of Ideal Conditions For Hatching Process
Creating the perfect hatching environment is a delicate balance that does not necessarily require mechanical aeration. Maintaining the right parameters is essential for the eggs to hatch. Here is a simplified guide:
- Salinity: A salinity level resembling natural sea water, between 25 to 35 parts per thousand, is optimal.
- Temperature: Warm water, typically between 26 to 28 degrees Celsius, accelerates the hatching process.
- pH level: Aim for a neutral to slightly alkaline pH, around 8.0, to ensure a safe hatching ground.
It is indeed possible to facilitate the hatching of brine shrimp eggs by gently agitating the water to increase oxygenation. Manual stirring or utilizing a simple container flip technique a few times a day can substitute for constant air supply from an air pump.
Gather Your Hatching Materials

Embarking on the journey on how to hatch brine shrimp eggs without air pump requires careful preparation and attention to detail. Discover how to assemble the necessary materials with a touch of ingenuity, leveraging the tools and knowledge you already possess. By doing so, not only will you create a thriving environment for your hatchlings but also gain a deeper understanding of the delicate art of brine shrimp cultivation.
Selecting The Right Type Of Brine Shrimp Eggs
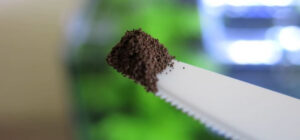
The first step in your brine shrimp hatching adventure is to choose the correct type of eggs. High-quality cysts are crucial, as they directly affect the hatch rate and the health of your future shrimp. Look for eggs with a high hatching percentage and purchase from reputable suppliers to ensure the success of your endeavor.
- Grade A Brine Shrimp Eggs: Known for their high hatch rates and quality.
- Decapsulated Eggs: These eggs have had their hard shells removed and can hatch without the need for rigorous aeration.
Necessary Tools And Equipment
While air pumps are commonly used to hatch brine shrimp, certain tools and equipment can facilitate the process in its absence. Assemble the following items to construct an effective hatching setup:
| Equipment | Description |
|---|---|
| Clear Container | Allows for light penetration and easy observation of hatching progress. |
| Heating Source | Necessary to maintain optimal temperatures (usually between 77-82°F). |
| Light Source | Brine shrimp are phototropic and swim towards light, easing the harvesting process. |
| Salinity Meter or Hydrometer | Ensures salinity levels are within the ideal range for hatching. |
Alternative Aeration Methods
Without an air pump, promoting oxygenation in the water becomes a challenge, yet alternative methods exist to introduce the much-needed circulation. These include:
- Manually stirring the water periodically to refresh oxygen supply.
- Using a syringe or turkey baster to gently squirt water, creating currents within the hatching container.
- Implementing the ‘upside-down bottle method,’ where a cut plastic bottle creates a gentle water flow mimicking an air pump’s effects.
Understanding the principles of water circulation and oxygenation is key to hatching brine shrimp without an air pump. Experiment with these methods to find the best fit for your setup and watch your brine shrimp thrive.
Easy Steps For Hatching Brine Shrimp Eggs
Welcome to the fascinating world of hatching your own brine shrimp, also known as Artemia salina! Whether you’re a hobbyist looking to feed your fish with live food or a curious aquarist aiming to observe the full life cycle of these tiny creatures, hatching brine shrimp eggs is a simple and rewarding process. The best part? You can successfully hatch them without the use of an air pump. Just follow these easy steps to create your own miniature hatchery.
Preparing Saline Water For Hatching

To kickstart the process, the right saline solution is critical. Brine shrimp eggs thrive in salty water, hence the importance of getting this step right. Here’s a simple way to prepare the perfect hatching environment:
- Measure one liter of dechlorinated water into a clean container.
- Mix in approximately 30 grams of non-iodized salt until completely dissolved.
- Ensure the solution is clear without any undissolved salt particles, which indicates it’s ready for the eggs.
The Right Temperature For Hatching Brine Shrimp Eggs
Maintaining an ideal temperature is essential for successful hatching. The optimal range for hatching brine shrimp eggs lies between 25 to 30 degrees Celsius (77 to 86 degrees Fahrenheit). Achieve this by:
- Placing the hatchery in a warm room or using a small heater if necessary.
- Checking the temperature frequently with a reliable thermometer.
- Making gradual adjustments to avoid shocking the eggs or hatchlings with sudden temperature changes.
Adequate Lighting Conditions
Light does more than just brighten up the room; it acts as a signal for the brine shrimp eggs to begin the hatching process. To ensure optimal lighting conditions:
| Duration: | Maintain continuous lighting for 24 hours during the entire hatching period. |
|---|---|
| Type: | Use a standard desk lamp with an incandescent or fluorescent bulb positioned several inches away from the hatchery. |
| Intensity: | A moderate level of light is sufficient, but ensure it’s not so dim that it prolongs hatching time or so bright that it heats the water excessively. |
With these simple but vital steps taken care of, brine shrimp eggs are well on their way to hatching into lively nauplii, ready to serve as nutritious snacks for fish or as an interesting observation project. Patience and consistency with these parameters will result in a bountiful hatch of brine shrimp.
Monitoring And Care During Hatching
Raising brine shrimp from eggs can be an exciting journey, but it requires careful monitoring and the right care during the hatching process. Even without an air pump, hatching brine shrimp is entirely possible. Paying attention to the health of the developing shrimp, the timing, and proper water circulation is crucial. Mastering these elements can lead to a successful hatch, providing a nutritious food source for your aquarium inhabitants or a satisfying project for hobbyists. Let’s delve into the practices that ensure a thriving hatch.
Key Signs Of Healthy Development
Observing the eggs and hatchlings requires attention to detail. Watch for signs of healthy development which include:
- Color changes: Fertilized eggs turn from a bright orange to a darker, more subdued hue as they develop.
- Movement: Initially static, eggs that are close to hatching will start showing signs of twitching. After hatching, look for swarming behavior in the nauplii.
- Size: Healthy nauplii will grow visibly as they consume their yolk sacs.
Regular inspections under a magnifying glass or microscope can offer a closer look at these key developmental stages.
Timing And Observation Without An Air Pump
Without an air pump, monitoring becomes even more crucial. Hatching brine shrimp without artificial aeration generally takes slightly longer, often 24 to 36 hours. During this period, checking in on the eggs every few hours is important to note progress and potentially make adjustments. Maintain the optimal temperature range of 77-82°F (25-28°C) to encourage steady development. Careful timing ensures you can separate the nauplii from unhatched eggs and eggshells at the optimal moment.
Adjustments To Ensure Aeration And Circulation
Adequate aeration and water circulation are essential in the absence of an air pump. Implementing manual stirring can simulate the oxygenation process. This technique will also help prevent eggs from settling at the bottom and clumping together. A simple method is to:
- Gently stir the water with a clean spoon or stick periodically.
- Ensure the movement is slow and steady to mimic the gentle flow of an air pump.
- Avoid vigorous stirring that might damage the fragile eggs and nauplii.
Lighting also plays a role in circulation. Using a light source at one side of the hatching container can create a thermal current; the warmer area draws the cooler water, promoting gentle circulation. Additionally, maintaining proper salinity and pH levels could reduce surface tension, aiding water flow and ensuring shrimp receive adequate oxygen.
Harvesting Your Brine Shrimp Successfully
Raising brine shrimp to their harvestable size is a satisfying endeavor, especially when done without the conventional air pump method. The true mastery lies in efficiently harvesting your brine shrimp to ensure you have lively, nutritious feed for your fish or a thriving colony for your ecosystem. This part of the process is critical, and understanding just when, how, and what to do with your tiny aquatic harvest can make all the difference. Let’s dive into the nitty-gritty details of brine shrimp harvesting!
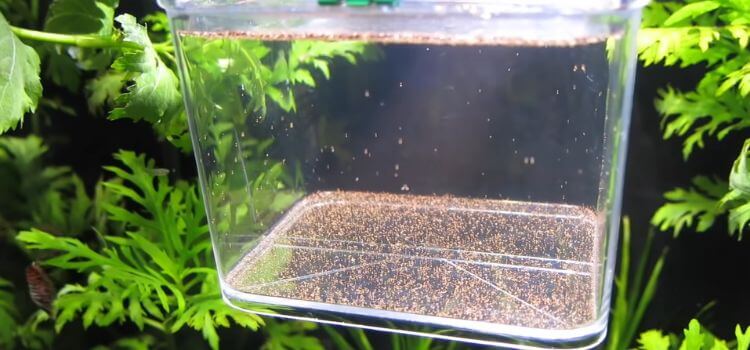
Identifying The Right Time To Harvest
Timing is essential when harvesting brine shrimp. Look for these cues to know they’re ready for harvest:
- The shrimp should be swimming actively, indicating they are mature enough.
- A majority of the eggs should have hatched, usually within 24-48 hours at optimal temperatures.
- The water should be clearer as the unhatched eggs and detritus settle at the bottom.
These indications ensure you’re collecting vibrant, healthy shrimp that can be an excellent food source or addition to your setup.
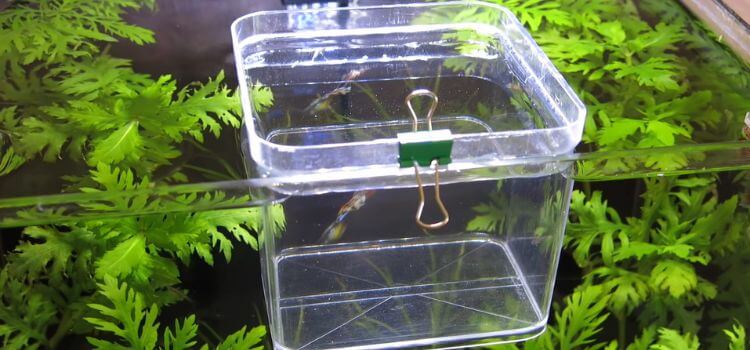
How To Separate Shrimp From Unhatched Eggs
Separating brine shrimp from the residual unhatched eggs can be challenging. To facilitate this process, use these steps:
-
- Settle: Allow the container to settle, enabling unhatched eggs to sink.
- Illuminate: Shine a light at the water’s surface to attract the shrimp.
- Siphon: Gently siphon the shrimp into a new container, leaving eggs behind. Taking care on the shrimp during this phase is key for their survival and future growth.
Techniques For Storing Or Feeding Your Brine Shrimp
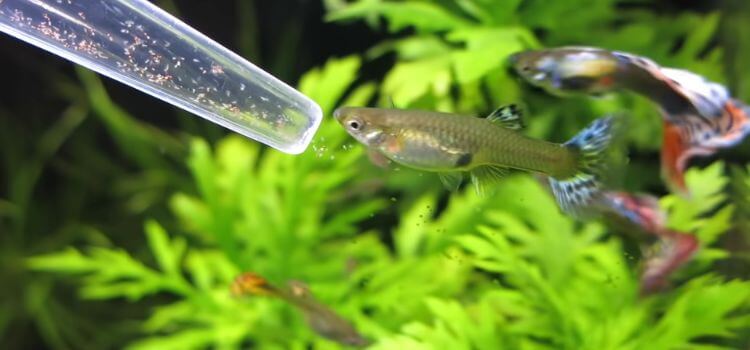
Once harvested, you must decide whether to feed the shrimp immediately or store them for later. If you’re feeding your fish, then:
-
-
- Rinse the shrimp in fresh saltwater to clean them.
- Introduce them directly into your aquarium.
- Keep the brine shrimp in a container with clean saltwater.
- Maintain a cool temperature and adequate salinity.
- Feed the shrimp with a pinch of yeast or spirulina if required.
-
Proper storage ensures longevity and nutritional value of the brine shrimp until they are needed.
Frequently Asked Questions Of How To Hatch Brine Shrimp Eggs Without Air Pump
Can Brine Shrimp Eggs Hatch Without Aeration?
Yes, brine shrimp eggs can hatch without aeration. You need stable temperature, saltwater, and plenty of light. The hatching process might be slower, but with patience, you’ll see results.
What Is The Ideal Temperature For Hatching Brine Shrimp?
The ideal temperature for hatching brine shrimp is between 26°C to 28°C (78°F to 82°F). Consistent warmth speeds up the hatching process and ensures higher hatch rates.
How Do You Make Saltwater For Brine Shrimp?
To make saltwater for brine shrimp, dissolve roughly 30 grams of aquarium salt in one liter of dechlorinated water. Ensure the solution is well mixed before introducing the eggs.
How Long Do Brine Shrimp Eggs Take To Hatch?
Brine shrimp eggs typically take 24 to 48 hours to hatch. The exact time may vary based on the temperature and salinity of the water.
Conclusion
Successfully hatching brine shrimp eggs without an air pump is achievable through simple, careful methods. Ensuring a gentle water current and optimal conditions allows for healthy hatch rates. Embrace these techniques for a budget-friendly, low-tech approach to nurturing your aquatic pets’ favorite snack.
Happy hatching!
As an Amazon Associate, I earn from qualifying purchases
